
A couple months back my mother-in-law dropped off a stack of my husband’s old t-shirts including five from his summer as a counselor at Camp Unistar. Joel was going to turn them into rags, but I secretly rescued them from the rag pile and re-purposed them as kid’s t-shirts.
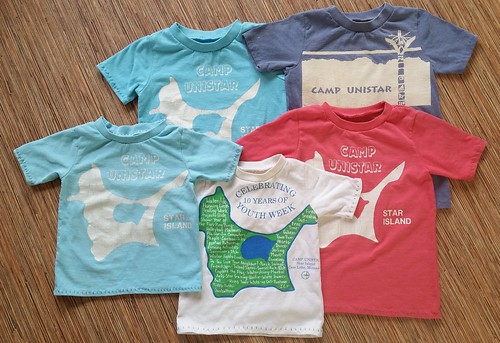
I used the Skinny Flashback Tee pattern from Made By Rae. I changed the long sleeves into short sleeves, but otherwise left the pattern unaltered. Size 2T fits Ethan and 5T fits Isaac perfectly.
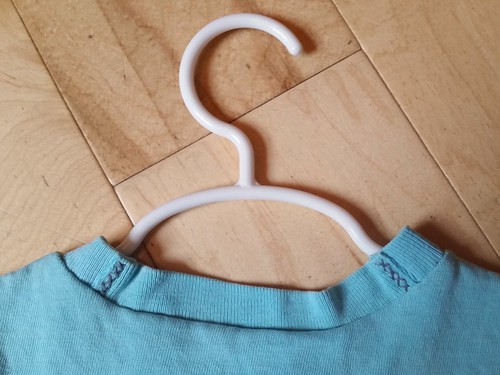
I used my serger for the shoulder and side seams and then hand-stitched the collar and hems – I think it was actually quicker that way! I’ve struggled for hours to serge a blind hem, with mediocre results. I used Wonder Clips to fold under and secure the hems, and a doubled length of heavy duty Coats and Clark thread for hand-stitching. It looks like a serged blind hem, but soooo much sturdier! I will be shocked if my kids can rip these hems.
I used a running stitch to attach the collars, being careful not to pull the thread taut. Toddlers have big noggins! I did have to redo one of the 2T collars that I’d stitched too tightly. I used flat seams in the ribbed collar to avoid bulky seam allowances.
I finished these shirts just in time for the kids to wear them on Father’s Day.
The first time I saw a La Passacaglia quilt on Instagram, I thought “wow, that’s beautiful!” My next thoughts were “those pieces are tiny,” “that is a LOT of work,” and “that whole project is crazy-pants. I’m not doing that.”
Well… here I am… making one of those. There are too many cute cogs popping up on my Instagram feed. A bunch of fellow MMQG members have started. And last fall when I visited my friend Julie we jumped on the bandwagon, too.
//platform.instagram.com/en_US/embeds.js
The pieces are tiny. And it will take a lot of time. But it’s so fun!
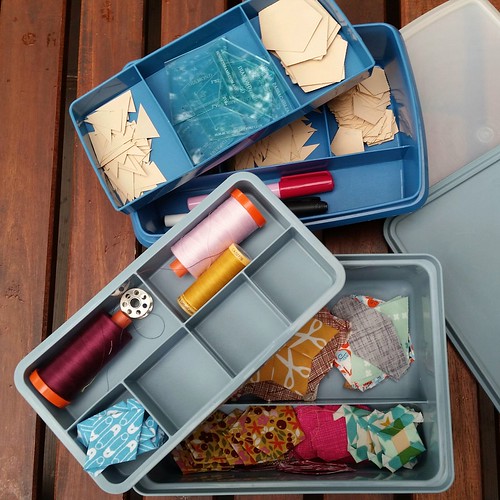
I’m using templates from Sunset Seams, precut papers from Paper Pieces, a SewLine glue pen and fancy Tulip needles from a recent Massdrop. I bought some vintage Tupperware on eBay to hold all my supplies.
 //embedr.flickr.com/assets/client-code.js
I’ve made a little progress in the last 8 months. I still need to choose fabrics for the diamonds in cog #1.
//platform.instagram.com/en_US/embeds.js
My plan is to sew the first three rounds of a bunch of cogs, then decide on a layout and start the next rounds. Here’s cog #2.
A photo posted by @carriebee04 on Jul 6, 2016 at 8:46am PDT
//platform.instagram.com/en_US/embeds.js
I’m drawing the line at fussy-cutting star points. I still think that’s crazy-pants.
 //embedr.flickr.com/assets/client-code.js
- Manchester Metallic Evening: 1 yard
- Essex Yarn Dyed Nautical: 1 yard
- Outback Canvas Navy: 1 yard
- Kona Cotton Berry: 3/4 yard
- Kona Cotton Wasabi: 3/4 yard
 //embedr.flickr.com/assets/client-code.js
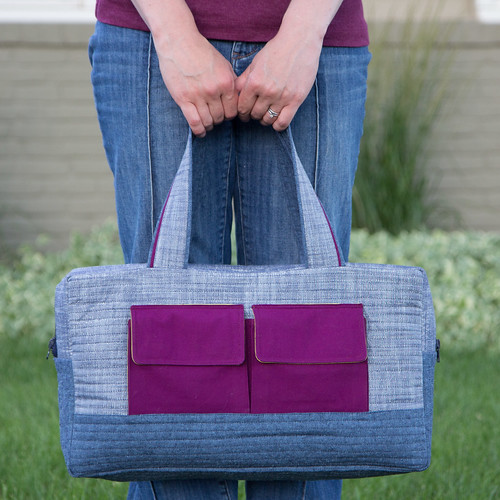
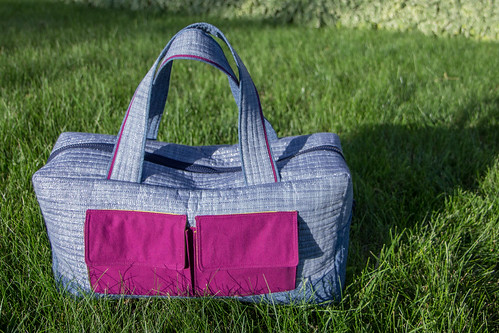
Look at how sparkly this fabric is in the sun! I love it. The Manchester Metallics fabric is soft and has a very nice drape. For this project I wanted more structure and less drape, so I fused medium-weight interfacing to the back of the Manchester Metallics fabric. As an added bonus, the interfacing prevented the lovely weave of the fabric from being distorted by the dense quilting. I cut the interfacing the same size as the quilt batting.
 //embedr.flickr.com/assets/client-code.js
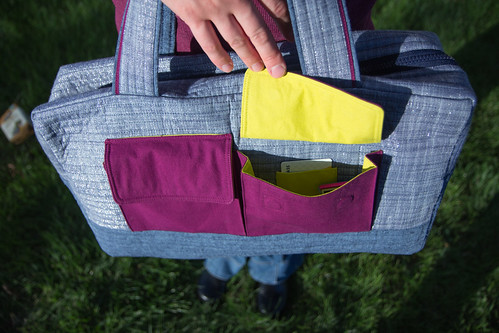
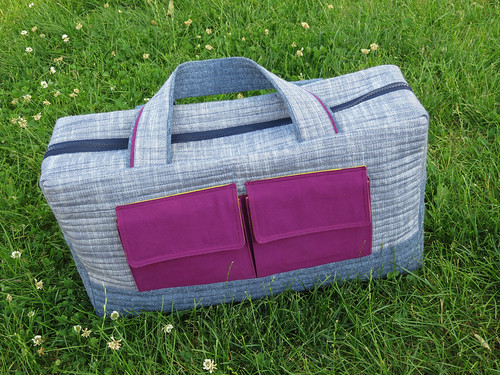
I added a card pocket to one of the exterior pockets. I also substituted magnets for snaps.
 //embedr.flickr.com/assets/client-code.js
I added another card pocket and a large pleated pocket on the interior. The interior pocket will hold a couple road maps.
//embedr.flickr.com/assets/client-code.js
A photo posted by @carriebee04 on Jun 26, 2016 at 9:37pm PDT
//platform.instagram.com/en_US/embeds.js
 //embedr.flickr.com/assets/client-code.js
Sandy Whitelaw of UpStairs Hobby Room
Michelle Morris of That Black Chic
Kathy Green of Designs by KTGreen
Carrie Federer of carrie bee
Anne Zeitler of AnneZPlace
Sanchia Gair of Red Brolly
Natalie Strand of Vegetablog
Devida Bushrod of The Driftwood Thimble
Sara Johansen of The Sara Project
Sarah Sharp of No Hats in the House
Michelle Webster of michellepatterns
Marni Weaver of Haberdashery Fun
Jenny of My Handmade Home
This is (apparently) the year of the potholder for me! I finished two sets of donut potholders this month. This super cute pattern by the talented Pen and Paper Patterns can be found on Craftsy here.
//platform.instagram.com/en_US/embeds.js
One tip if you’re going to make these – and I think you should – is that a 23″ x 2.25″ strip of bias-cut binding works well. I cut a 23″ strip of binding and use the Binding Tool by TQM to cut the 45 degree angled edges. I sew the angled edges of the binding together, press, pin liberally, and machine stitch the binding on.
I sent the chocolate sprinkle donuts to my brother-in-law and his family just in time for National Donut Day. I had a hunch they would not let the day go uncelebrated. They didn’t 🙂
A photo posted by @carriebee04 on Jun 18, 2016 at 1:28pm PDT
//platform.instagram.com/en_US/embeds.js
The rainbow sprinkle donuts are for my family. We also couldn’t let National Donut Day go uncelebrated – we made a brief stop at a Dunkin Donuts on our way to Mystery Cave State Park. Big chain donuts are ok in a pinch, but my all-time favorite donuts are the cherry and blueberry cake donuts from Donutland in Iowa. I’ve searched for a comparable Minneapolis/St. Paul donut shop and Granny’s Donuts comes pretty close. I still go back to Donutland every chance I get, though.
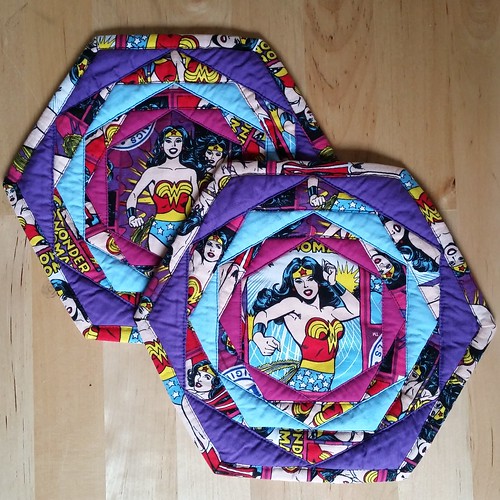
I’ve whipped up two more sets of Happy Hexagon Trivets! I used the Wonder Woman fabric by Camelot (from Joann’s) and bits of solids from my stash. The pattern is from the book Patchwork Please.
 //embedr.flickr.com/assets/client-code.js
I am still a huge fan of this pattern! These are the second and third sets I’ve made this year and I know I’ll be making more. These were birthday presents for two dear friends, both Wonder Woman fans. The last set just went to its new home this week, so it’s safe to share 😉
A photo posted by @carriebee04 on Jun 17, 2016 at 7:20am PDT
//platform.instagram.com/en_US/embeds.js
I’m linking up to Crazy Mom Quilts finish it up Friday post.
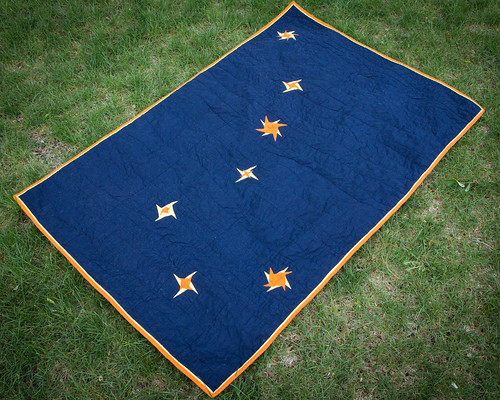
Done and done! I finished not one but TWO quilts in the past month. I first had the idea for these quilts 3 years ago, and of course I immediately bought fabric. I wanted the stars to be different shapes and sizes, relative to their brightness in the actual night sky. I also wanted a lot of open space and just a few colors. I drew a couple sketches, did a little math, and then put the project on the back burner for quite a while… until I had a new baby and a quilt show to motivate me 😉
 //embedr.flickr.com/assets/client-code.js
I designed paper piecing templates for the stars. All the blocks are the same size – 4 inches – but all the stars are a bit different.
I used Susie’s Magic Binding Tutorial for the faux-piped binding. Looks complicated, but it’s not! This first version is a baby quilt, finished at 36″ x 50″.
//embedr.flickr.com/assets/client-code.js
I was stumped on how to quilt this for a few days. I would’ve loved to do free-motion spirals or waves around the stars, reminiscent of Van Gogh’s Starry Night, but that’s above my skill level for now. I settled on horizontal wavy lines, done with a walking foot. I carefully outlined the stars and made sure not to quilt through them. The result is a pretty snugly baby quilt! I finished the quilt just in time to wash it and snap a few pictures before I sent it off to its new home.
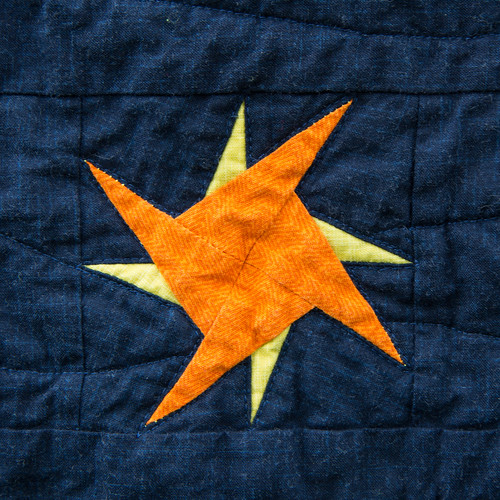
The second version is a twin-size quilt for my son, and my entry into the “Minnesota Modern” exhibit for the Minnesota Quilters annual show. I still used just 2 colors for the stars, but I used 9 different batiks for the background – 3 waxed patterns, and 6 marbles. I really like the texture and depth! I enlarged the paper piecing templates to make 5″ finished blocks.
A photo posted by @carriebee04 on May 19, 2016 at 7:51am PDT
//platform.instagram.com/en_US/embeds.js
The big dipper asterism (not a constellation) fits on the top of a twin mattress. I finished with a scrappy binding that blends with the background. Expect more pictures (and a pattern!) when I get it back from the quilt show!
I worked so very hard on this shirt, but it just didn’t work out.
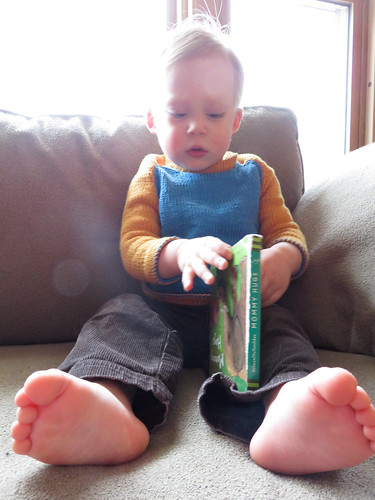
You might not notice it in the picture above, but the hem is flipping up, the shoulders are bunching up, and the collar is standing up.
Definitely noticeable in this picture, though! The shirt is also pretty tight – I knit the 24 month size, but I had to squeeze it over Ethan’s 19 month head. He has an average-sized noggin. The sleeves were also quite snug. I’m not quite sure where things went wrong, but this is my biggest knitting fail in a while. I used a less-drapey yarn than what the pattern called for. I measured Ethan one day, but didn’t finish the sweater until about 9 months later. I made a bunch of mistakes and frogged repeatedly. I think I fixed the errors and followed the pattern, but I’m not going to double-check my work. I realized I don’t like the turned-hem with baby garments – it took sooooo long to knit, and I think it looks odd with such bulky yarn and such a tiny garment. I would use a turned hem on an adult sweater, though. I’m also pretty proud of the raglan seams. I would also use those on an adult sweater as well. So I’m looking at this as a toddler sweater fail, but successful practice for my next sweater for myself 🙂
//embedr.flickr.com/assets/client-code.js
Yarn: Brown Sheep Cotton Fleece (blue) and Berroco Weekend (orange)
Needles: US5
Pattern: Spring Training T-Shirt
I finished stitching this embroidery hoop just in time for an overcast and rainy April week. I hung it on a very sunny Sunday and snapped a picture before the clouds rolled back in.
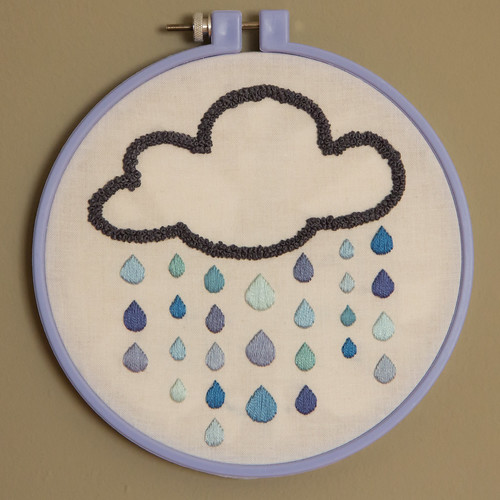
I used a couple rows of loose french knots to outline the cloud and satin stitch for the raindrops. I settled on using 7 different blue/green/violet DMC flosses for the raindrops, after much waffling between rainbow and blues.
I just put the PDF pattern up on Craftsy, and I’ve made swatches available on Spoonflower (for those of you who hate transferring paper embroidery patterns). For my hoop I used a Spoonflower swatch on Kona cotton.
It’s done!
//platform.instagram.com/en_US/embeds.js
I’m so happy to be hanging my ticker tape canvas today! I started it at the Minneapolis Modern Quilt Guild‘s February meeting. Amanda Jean of Crazy Mom Quilts gave us a quick how-to and then we all got to work trimming, gluing and swapping scraps.
I started with the bit of Heather Ross bumble bee fabric, which I chopped out of a (previously uncut) fat quarter. So much for starting with scraps! I feel a little guilty every time I fussy-cut fabric – my grandma took me to many meetings of her church sewing group where much time was spent carefully arranging and rearranging pattern pieces, trying to squeeze as many pattern pieces as possible onto a yard of fabric. I try to assuage my fussy-cutting guilt by reminding myself that fabric sitting on the shelf, uncut and unused for years, is also a waste. I’m hanging this ticker tape canvas in my sewing room, where I’ll get to see it (nearly) every day.
I’m linking up to Amanda Jean’s Finish it up Friday post.
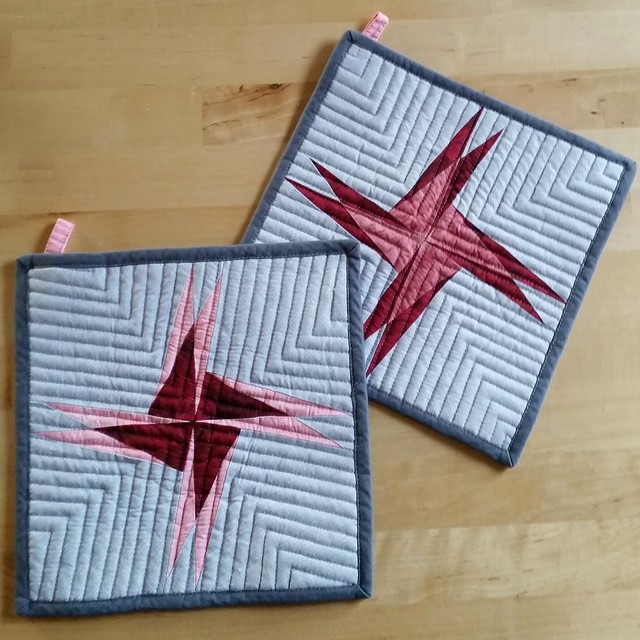
I made this set of MidMod Starburst pot holders for a friend who just finished taking the bar exam. A little “congrats and welcome back to normal life” gift. I used the 9″ block pattern and the last scraps from a queen-size pink quilt that she commissioned about 6 years ago.
 //embedr.flickr.com/assets/client-code.js
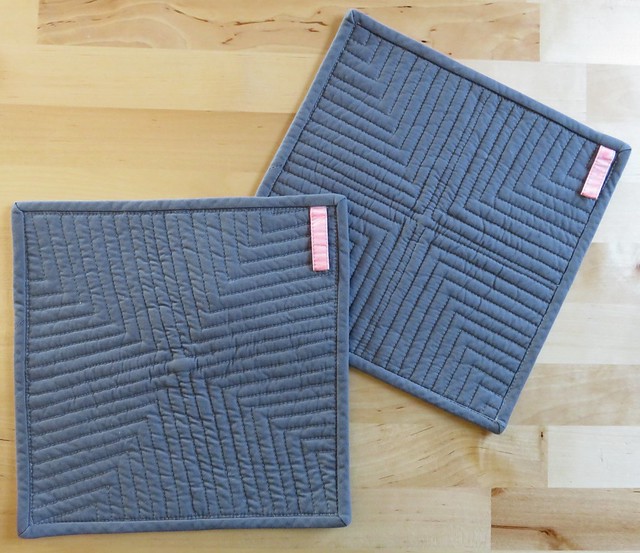
I quilted the pot holders following the lines of the starburst block. I especially like the offset lines on the left block. Such dense quilting makes the back of the pot holders look sharp, too!
 //embedr.flickr.com/assets/client-code.js


